Monday, 14 July 2014

WEDDING DIY: Distressed Mason Jar

DIY projects are the best when you have a bit of time to spare but still want to feel like you've done something productive! I love spending my holidays making things and over the past year the focus has been our wedding. After browsing Pinterest numerous times a day I knew I wanted to have a go at distressing some Mason jars. When I went to America at Easter I bought a pack of 12 Mason Jars for something ridiculous like $8! A LOT cheaper than over here in the UK that's for sure!! I somehow managed to get them back here, without one single one smashed. Quite an achievement when taking connecting flights too!


These Distressed Mason Jars are so quick and easy; grab a sunny day, set yourself up outside and enjoy....


What you'll need:
Mason Jars
Acrylic Paint
Paintbrush or Sponge Brush
Nail File


What to do:
1) Decide on the colour you'd like to paint them, I went for a pastel blue so that it's in line with our wedding but any colour would work really.

2) Mix a lot of the colour you've decided, it's surprising how much paint is needed to paint 12 Mason Jars!


3) Paint the outside of the Mason Jars completely. I painted a thin layer, let it dry and then painted another layer. This ensures that there are some layers to take off when you want to create the distressed look.
TIP: If you don't want brush strokes then use a sponge brush.


4) Once the outside of the Jar is completely covered in paint and has dried you can start distressing it. Using a nail file means you have more control over the areas you want to distress. I wanted to just take off the paint on the lettering, gently rubbed over those areas and the paint comes off.


5) That's it! As there's no paint inside you could use these for flowers or storage jars - anything that takes your fancy :)


Feel free to leave me a comment :)


Helen x


SHARE:

Tuesday, 3 December 2013

CHRISTMAS: Handmade Pom Pom Wreath

 
On the run up to Christmas this year I've really enjoyed having a go at making some Christmas decorations. I have seen this bright colourful felt wreath a couple of times this Christmas and fell in love with it. But the price tag didn't get much love, it's £60!! I simply couldn't justify paying that much for a wreath that is only up such a small amount of time, so I made it my mission to either find a cheaper version or make my own.
 
 
On a recent trip to The Range  I spotted these kind of felt pom poms, at £1 for 50 I thought they'd be perfect for making my much wanted wreath! I bought 4 packets, although I only needed 2, as well as a pack of 2 polystyrene wreaths for £1. I originally thought that I would be able to use craft glue (which is in the picture below) but I quickly realised it was a superglue job, as the pom poms kept falling off.
 
What you'll need:
 
Pom Poms
Polystyrene Wreath
Superglue
 
 
What to do:
 
1) Take a pom pom and stick it on the top of the wreath, hold for about 30 seconds or until the superglue has bonded. Although my pattern didn't work throughout the whole wreath (as spaces needs to be filled) it's good to try and make sure that the same colours don't sit next to each other. However it is completely up to you!
 
 
2) Repeat this process across the front of the wreath. I didn't bother sticking any pom poms on the back of the wreath as no one can see it and it helps it to lay flat.  
 
 
That's it, the whole wreath can be made in less than 30 minutes and only cost around £5 - considerably cheaper than the £60 one I originally wanted!
 
 
Are you making any Christmas decorations this year?
 
Feel free to leave me a comment :)
 

SHARE:

Sunday, 1 December 2013

CHRISTMAS: Homemade Advent Calendar

 
It's finally the 1st December today!! The last week of November always seems so long, as the anticipation, excitement and present shopping start to build up, ready for CHRISTMAS!!
 
So after visiting The Festive Gift Fair on the 23rd November I felt inspired to create my own Advent Calendar this year! This is a quick, easy and cheap advent calendar that can be used every year. I bought these adorable reindeer pegs from The Festive Gift Fair, at £1 for 6 they were a bargain, I bought 4 packs which conveniently was 24 pegs. The ribbon was £1 from The Range and the superglue was £1.25 from Tesco, so overall very cheap!
 
 
What you'll need:
 
2m Ribbon
Christmas decorative pegs x24
Superglue
Scissors
Ruler
 
What to do:
 
1) Lay the ribbon out on a flat surface. You'll need to have the whole length of the ribbon on the surface so that you can measure where the pegs need to go.
 
 
2) Measure how far apart you want the Christmas pegs, I had mine about 5cm apart but it depends on the length of ribbon and type of peg. It's completely up to you! Make sure you leave some ribbon on either end so that you can tie the advent calendar up for display.


3) Once you are happy with where the pegs are going to go along the ribbon you can start gluing! Using superglue means that this is a quick job and makes them more sturdy, as they are going to have to hold some weight.   
 
 
4) Leave each peg to dry for about 30 seconds before you move on to sticking the next peg. Once you have stuck all of the pegs down then you have to choose where to display it, as the countdown to Christmas begins!


You can have anything on this advent calendar - stripy paper bags with sweets in, beauty minis, candy canes etc.

Have you ever tried making your own Advent Calendar?
 
Feel free to leave me a comment :)
 
SHARE:

Wednesday, 2 October 2013

I MADE: Vintage Inspired Tea Cup Candle with EllaPure Essential Oils

 I've been wanting to make a tea cup candle for a long time, over the summer I bought the candle wicks off eBay and I did try making a candle in a patterned glass but it was a bit rubbish! So I thought I'd research it a bit more and then have a second attempt.
 
This time I had a go at making a scented candle, as I was kindly sent these Essential Oils from EllaPure. Lavender, Tea Tree, Lemongrass, Ylang Yland and Eucalyptus Essential Oils are sold in a set for £28 from the EllaPure website (see here). These Essential Oils are completely natural, so are some of the highest quality essential oils you can buy! I hadn't realised that there are almost endless uses for essential oils, from mixing them with body creams to target certain skin issues to homemade sugar scrubs.  


You'll need:
 
Essential Oils (this set from EllaPure are the highest quality, so are perfect for candle making)
Tea cup and saucer
Old candle
Wick (I bought a set of 50 off eBay for £3.99)
Glass bowl
Saucepan
Disposable bowl/pourer
2 Skewers


What to do:
 
1) Cut up the candle carefully and pop it into a glass bowl. Place the bowl over some boiling water (ensuring the water isn't touching the bottom of the bowl). The candle wax will then gradually melt. I used a skewer to stir the melting wax, so that I could throw it away afterwards.
 
 
2. Once some of the wax has melted dip the metal end of the wick in and then hold it in place in the tea cup. This helps to keep it in place when the melted wax is poured in. Once you've done this you'll need to place 2 skewers either side of the wick and balancing on the top of the tea cup. This again helps to keep the wick in the middle.  
 
 
3. Once the wax has completely melted then drip in a couple of drops of EllaPure essential oils. I chose to use the Lemongrass scent because I was making this for someone who loves citrus! You only need a few drops if you're using such a high quality essential oil but it's completely to your preference. That's the brilliant thing about making your own candle - it's exactly what you want!  


4. Using a disposable container (I used an ice-cream tub) scoop up the melted candle wax, being really carefully as it will be so hot, and pour it into the tea cup. Try not to let any drip because it can be hard to clean it off again!
 
 
5. Once the tea cup is as full as you want it to be let it cool down. I found leaving it overnight was perfect.
 
 
6. If the wick is too long then cut it to the desired length and that's it! So quick and easy, making a lovely personalised gift for someone.


 What do you think?
 
Feel free to leave me a comment :)
 
SHARE:

Wednesday, 18 September 2013

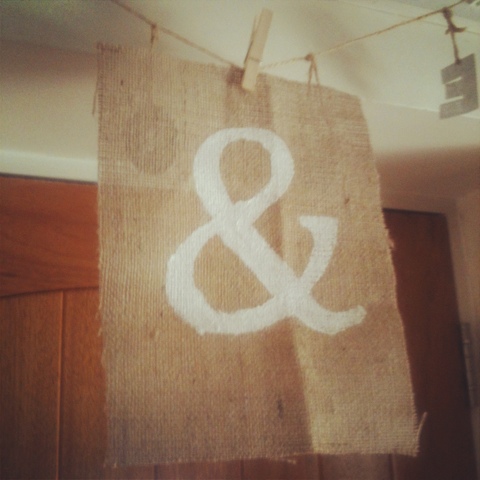
I MADE: Wedding Burlap Bunting

This is one of my favourite craft projects of this summer (which seems ages ago now!) - as usual it's cheap to make and very effective! I've seen loads of burlap (a rustic material) bunting in pictures of Tipi weddings, like we're having. I fancied having a go at making my own, I started looking for burlap material. I found a bargain on eBay - click here - 1.82mx1m burlap material for £3.39! (I paid £2.39 but it seems they've increased the price since I bought it a month ago - still a huge bargain for the amount you get).
 
What you'll need:
Burlap material
Craft Knife - I bought a set for £1 from Poundland
Printed letters in the size you want your bunting to be
Acrylic Paint in the colour you want the letters to be
Scissors
Twine
Cotton thread
Needle
 
What to do:
1) Put your printed letters (you can make this bunting to say anything, depending on your occasion) on a surface that you can use a craft knife on. I used the back of a photo frame I bought from a carboot sale but don't like at all! Carefully (you need a very steady hand) cut around the outside of each letter. This creates a stencil for you to paint with. 


2) Next, cut out the burlap to the size you'd like each bunting triangle/square/rectangle to be. I decided to make mine rectangle, I used a place mat as a template. You have to make sure that your printed letters fit in the bunting your cutting out! The nature of the material means it will fray but that's also part of the look of this bunting.

 
3) Place one burlap bunting on a surface that's ok to paint on, put the letter stencil on top and using acrylic paint, paint on the letter. You could paper clip the letter in place, but I just held it. Then repeat for all of the other letters/shapes.


4) To let them dry I pegged them to some string, which was perfect for letting the paint dry on both sides.

 
5) Finally, to connect each letter together I used some white cotton thread and sewed some twine the letters. I kept a 5cm gap between letters within a word and 9cm gap between new words.

 
The final burlap bunting...
 
Sorry about the strange angle of these photos, it's currently hanging on our stairs as it was the only space big enough!


Will you have a go at this rustic bunting?
 
Feel free to leave a comment :)
 
SHARE:

Tuesday, 27 August 2013

I MADE: Glass Tea Light Holders

This seems to be the summer of craft for me and I'm loving it! These Glass Tea Light Holders are so easy and cheap to make, they could also be used as storage containers! The ones I made are currently at work acting as pencil pots but I'm planning on using them at our wedding too.
 
What you need:
Thin patterned material - I found these scarves in the 99p shop, for 99p each (surprisingly!). The darker star pattern didn't look as good because the glue dried slightly white, I'd recommend fabric with a lighter pattern.
Craft Glue - this set was from Poundland
Old Jam Jars
Scissors
LED Tea Lights - you can get a pack of 3 for £1 from Poundland
Paintbrush
Splash of water

 
What to do:
1) Cut the material in strips that are just a bit longer than the height of your jam jar.


2) Mix a splash of water with the craft glue to loosen the glue up slightly. Make sure it's not too runny though, otherwise it will take a long time to dry and the material may slide down in the jam jar.
 
 
3) Place a strip of the fabric in the glue/water mixture, until it's completely covered.

 
5) Carefully place the strip of fabric on the INSIDE of the jam jar, using the paintbrush to smooth out any air bubbles. You then repeat step 4 and 5 until the inside of the jam jar is completely covered. Don't worry if the fabric hangs out the top of the jam jar, you can trim this when it's dried.

 
6) Leave them to dry overnight, then trim away any excess fabric from the top of the jam jar. Pop in an LED tea light and there you have it! I wouldn't recommend putting a normal tea light in because the fabric will be flammable.
 
 
Here they are finished...


What do you think?
 
Feel free to leave me a comment :)
 
SHARE:
© Treasure Every Moment. All rights reserved.
BLOGGER TEMPLATE BY pipdig