As maternity leave started and the time came to set up the Babybay Bedside Cot I began to think about how to make the area next to my bed a bit prettier. As the Babybay is a co-sleeper it replaced my bedside table and all the little ornaments I had on there. I wanted to make the area a bit more baby focused and popped onto Pinterest for inspiration (check out my Nursery Inspiration board for lots of ideas). Something that I kept being drawn to were the endless photos of felt bunting hanging behind cots, under shelves etc. Such a simple idea, yet so effective. Instead of buying one, though there are so many beautiful ones out there, I decided to have a go at making one.
I had lots of felt left over from another craft project, a bag of cotton wool and plenty of cotton thread...all supplies were already in the house. So I set off cutting out stars and clouds to sew together and create this felt bunting, perfect for nurseries, children's bedrooms etc. It is honestly a very easy DIY project because trust me when I say that my sewing skills are basic. It was also a nice little activity to do that was away from a computer screen and Isabella helped stuff each shape with cotton wool, which she loved doing!

What you'll need:
Felt Sheets, in your desired colours
(I got mine from Hobbycraft)
Paper
Pencil
Scissors
Cotton Wool Balls
Cotton Thread, in either complementary or opposite colours to your felt
Needle
Glue Gun
(I have this one from Hobbycraft)
What to do:
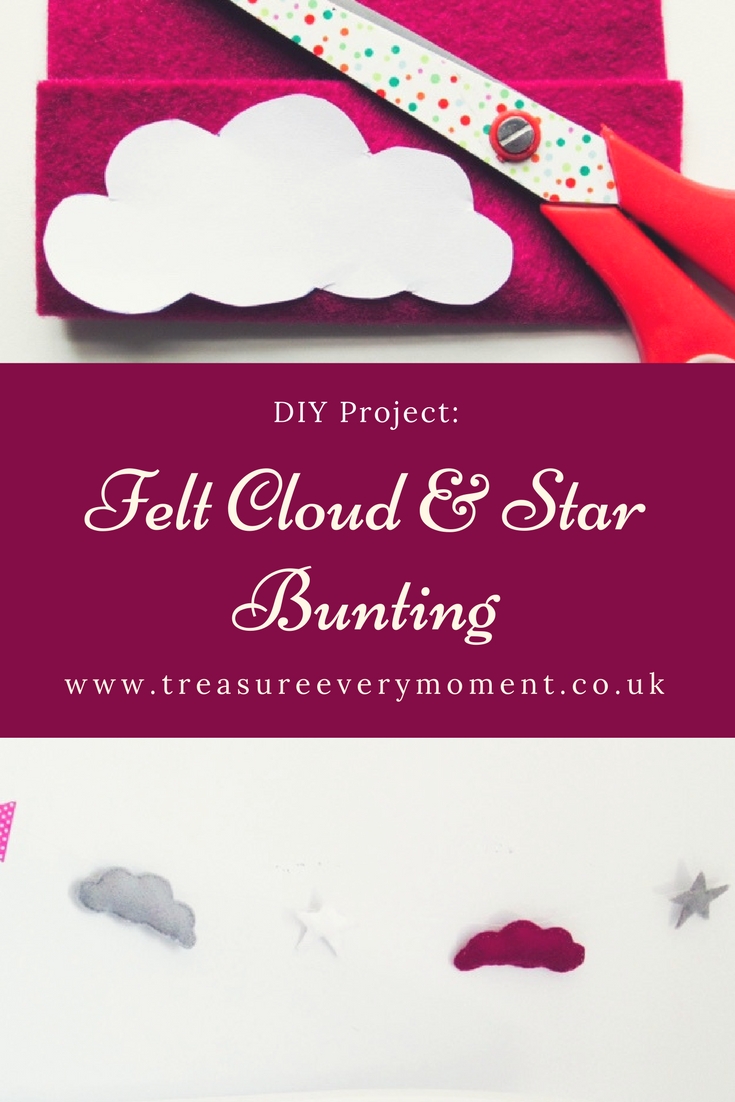
1) Decide on the design of your felt bunting - Pinterest is filled with inspiration, as is a simple Google search. After much deliberation I settled on clouds and stars, so I drew them onto a piece of paper and cut them out. You can decide the size of each item you'd like, just draw it bigger/smaller depending on what you want the finished look to be.
2) Once you have your paper templates place one of them on the felt sheet and fold the sheet over. This creates a double layer allowing you to cut the front/back of each design out at the same time, ensuring they are exactly the same size/shape. Cut out as many of each design as you'd like. I did three clouds and three stars.
3) Keeping the front/back of each design you've cut out together start a running stitch around the outside. To do this I thread the needle with white cotton thread and then sewed backwards and forwards a few times in the same spot, this stops the thread from being pulled out easily. I like to keep the running stitch as close to the edge as I can, so that it is more subtle.
4) Once you have sewn about three quarters of the way around stop and stuff the centre with small pieces of cotton wool. You could use any stuffing materials, but we had some cotton wool spare and it is cheaper than craft stuffing. Stuff the centre and use a pencil to stuff all of the corners evenly. Then continue sewing until you've gone around the whole shape.
5) Again go backwards and forwards a few times with the thread, as to stop the shape coming undone. Repeat with all of the other shapes you've cut out.
6) Once you have all of your shapes sewn and stuffed then you can assemble the bunting together. Place them in the order you would like them to hang. Then heat up a glue gun and cut a length of the white cotton thread, though you could use ribbon or string too.
7) Place a small dot of hot glue in the top centre of one of your shapes, then carefully place the thread into the dot of glue. This is really hot, so be careful! Allow to cool for a few seconds and then repeat with all of the other shapes you've made. Make sure you leave a short length of thread either end free, so that you have something to washi tape to the wall once it is finished.
8) Allow to cool completely and then you are ready to fix it to the wall. I used coordinating washi tape on either end of the bunting because it is such a quick and easy way of hanging your bunting up.


Have/are you making anything for your little ones bedroom?
Feel free to leave a comment - I love reading every single one :)
Helen x
I don't have children but my mum used to always make me knick knack's for my bedroom as a child!
ReplyDeleteAw these are really cute! I might have a go at this for the new baby's nursery xx
ReplyDeleteThese are so cute! I have been deciding on something like this for my next child's nursery! whenever that is haha!
ReplyDeleteSo so cute! What a lovely happy sight to look at and you must take a photo to keep and remind yourself of such tender happy times. They grow so fast and I have my boys hanging mobiles around our house still many years on! They make me smile xx
ReplyDeleteI have never been good at anything DIY but loving your tutorial, I think I can follow just fine.
ReplyDeleteI am no good at DIY but I am learning. Thanks for this post. Will try something similar.
ReplyDeleteaww this is so sweet and perfect for the nursery! I like to try DIY but not sure I am overly good at it :p
ReplyDeleteThis looks so cute and would work for next years camp bestival trolley decorations
ReplyDeleteOh how cute is this? I love DIY projects and am often starting something new :) x
ReplyDeleteThis is such an adorable craft! I think little homemade touches like this can make all the difference to a room.
ReplyDeleteAw these are adorable! Definitely going to try this for my.little girls room :) x
ReplyDelete