Tuesday, 28 April 2020

RECIPE: Quick and Easy Dirt Bike/Motorbike Chocolate Cake

Do you know someone who loves motorbikes? Then this is the cake for them and best of all it is really easy and quick to make too (with the help of a few hacks along the way!). As a busy parent myself I don't always have time to bake from complete scratch, so I love to utilise the home baking kits supermarkets have. I don't want to call this a 'cheat' because in my eyes you are still home baking a cake, but a few of the 'making' steps are cut out so it is simple, quick and easy to do. The ideal solution for anyone with a busy lifestyle that still wants to make the birthday boy/girl a special cake that they'll love.
SHARE:

Thursday, 4 June 2015

FOOD: Rocky Road Recipe

When you're after a sweet treat that doesn't take much time to prepare then rocky road is the one for you! We've had lots of visitors coming over to see Isabella recently and there's nothing better than providing a sweet treat and cup of tea. I've made three, yes THREE, batches of this rocky road over the past few weeks, but have mixed it up slightly. It was officially Rocky Road Day (who knew such a day existed) a couple of days ago, that's how I'm justifying it! Personally, this is my favourite version of rocky road but I've also made a dark chocolate and ginger biscuit version. So feel free to create your own version too!
 What you'll need:
3 tbsp Golden Syrup
300g Milk Chocolate, broken into chunks
100g Rich Tea Biscuit, crushed
50g Mini Marshmallows 
50g Butter
75g Malteasers 
Handful of Raisins
 What to do:
1) Place a glass bowl over a pan of boiling water and add the chocolate chunks, butter and golden syrup. Gently melt the mixture, stirring regularly to ensure the chocolate doesn't overheat. If you overheat the chocolate it will split and be ruined, so keep it on a low heat. 

2) Once the chocolate mixture is completely melted take it off the heat and stir in the raisins, crushed biscuits, mini marshmallows and malteasers. 

3) Empty the chocolate mixture into a lined baking tray (that has raised edges) and flatten with the back of a spoon. Place in the fridge for a couple of hours, or until the rocky road is set.

4) Carefully heat a sharp knife with some boiling water and cut up into whichever size squares you would like. Enjoy with a cup of tea.
Which ingredients do you like in a rocky road?

Feel free to leave me a comment :)

Helen x

PS. If you'd like the chance to win 3x Tommee Tippee cups from their new range then head over to my last blog post and enter via the rafflecopter! 
SHARE:

Monday, 11 February 2013

A COMPLETELY edible dessert?!

I don't know about you but sometimes when I'm eating a delicious dessert, I just wish it would never end?! It got me thinking, can there be a dessert that is COMPLETELY edible, from the bowl to the spoon? So for all those dessert lovers out there, I've created a delicious dessert that you can eat the WHOLE thing! Good idea? I definatly think so, just think - no washing up, no tidying away, no waste - perfect :)

This dessert consists of a chocolate bowl, delicious dessert and shortbread spoon!

 
The first thing you need to make is the Chocolate Bowl, for this you'll need 4 cupcake cases (I used the Valentine's cupcake cases from cakecraftworld.co.uk, which you can see in this post here), 100g milk or dark chocolate.

Method:
1) Melt the chocolate in the microwave in short bursts, stir it every 20 seconds to make sure it doesn't burn. After burning a lot of chocolate, I tend to take it out of the microwave with a couple of lumps still in, when you stir it the lumps melt and disappear.
2) Put the cupcake cases in a muffin tray, then put a teaspoon of the melted chocolate in the bottom of the cupcake case. With the back of the spoon smooth the chocolate up the sides of the cupcake case, covering it completely. You might need more than a teaspoon, it depends on the size of your cases.

3) Once there is a layer of chocolate completely covering the cupcake case, about 2mm thick, then place them in the fridge to cool.


4) Once they are set solid, peel off the cupcake case and there you have an edible chocolate bowl!

To make the Shortbread Spoon you will need to make a standard shortbread recipe. This recipe makes about 10 'spoons', so a lot more than you need but who minds having extra shortbread to munch on?

Ingredients:
65g Butter
30g Caster Sugar
90g Plain Flour

Method:
1) Heat the oven to 190'C. Beat the butter and the sugar until smooth.
2) Stir in the flour to create a smooth paste, turn out on to a worksurface and roll out until 1cm thick.
3) I have a spoon shaped cookie cutter that I bought from Oil & Vinegar (or you can buy them from places like www.ebay.co.uk), but if you don't have one then use a dessert spoon as a template to cut out a spoon shape. Cut out spoon shapes and place on a baking tray. Sprinkle with caster sugar and chill in the fridge for 20 minutes.


4) Bake in the oven for 10-15 minutes or until pale brown. Cool on a wire rack.

Now on to the filling, you can put whatever takes your fancy in the chocolate bowl. It needs to be quite soft, otherwise the biscuit spoon will break but other than that it could be mousse, Angel Delight, soft scoop ice cream, fresh fruit, cheesecake filling, salted caramel, flavoured cream etc.

I decided to make a Vanilla Panna Cotta:

Ingredients:
3 gelatine leaves (or vegetarian Pectin)
250ml milk
250ml double cream
1 vanilla pod, split lengthways, seeds scraped out
25g sugar


Method:
  1. Soak the gelatine leaves in a little cold water until soft.
  2. Place the milk, cream, vanilla pod and seeds and sugar into a pan and bring to a simmer. Remove the vanilla pod and discard.
  3. Squeeze the water out of the gelatine leaves, then add to the pan and take off the heat. Stir until the gelatine has dissolved.
  4. Pour into a jug and put it in the freezer for 20 minutes, every 5 minutes stir the mixture. This will cool the mixture because if you pour the hot mixture into the chocolate bowls they will melt. Once the mixture has cooled enough not to melt the chocolate divide the mixture among chocolate bowls. Place into the fridge for at least an hour, until set.


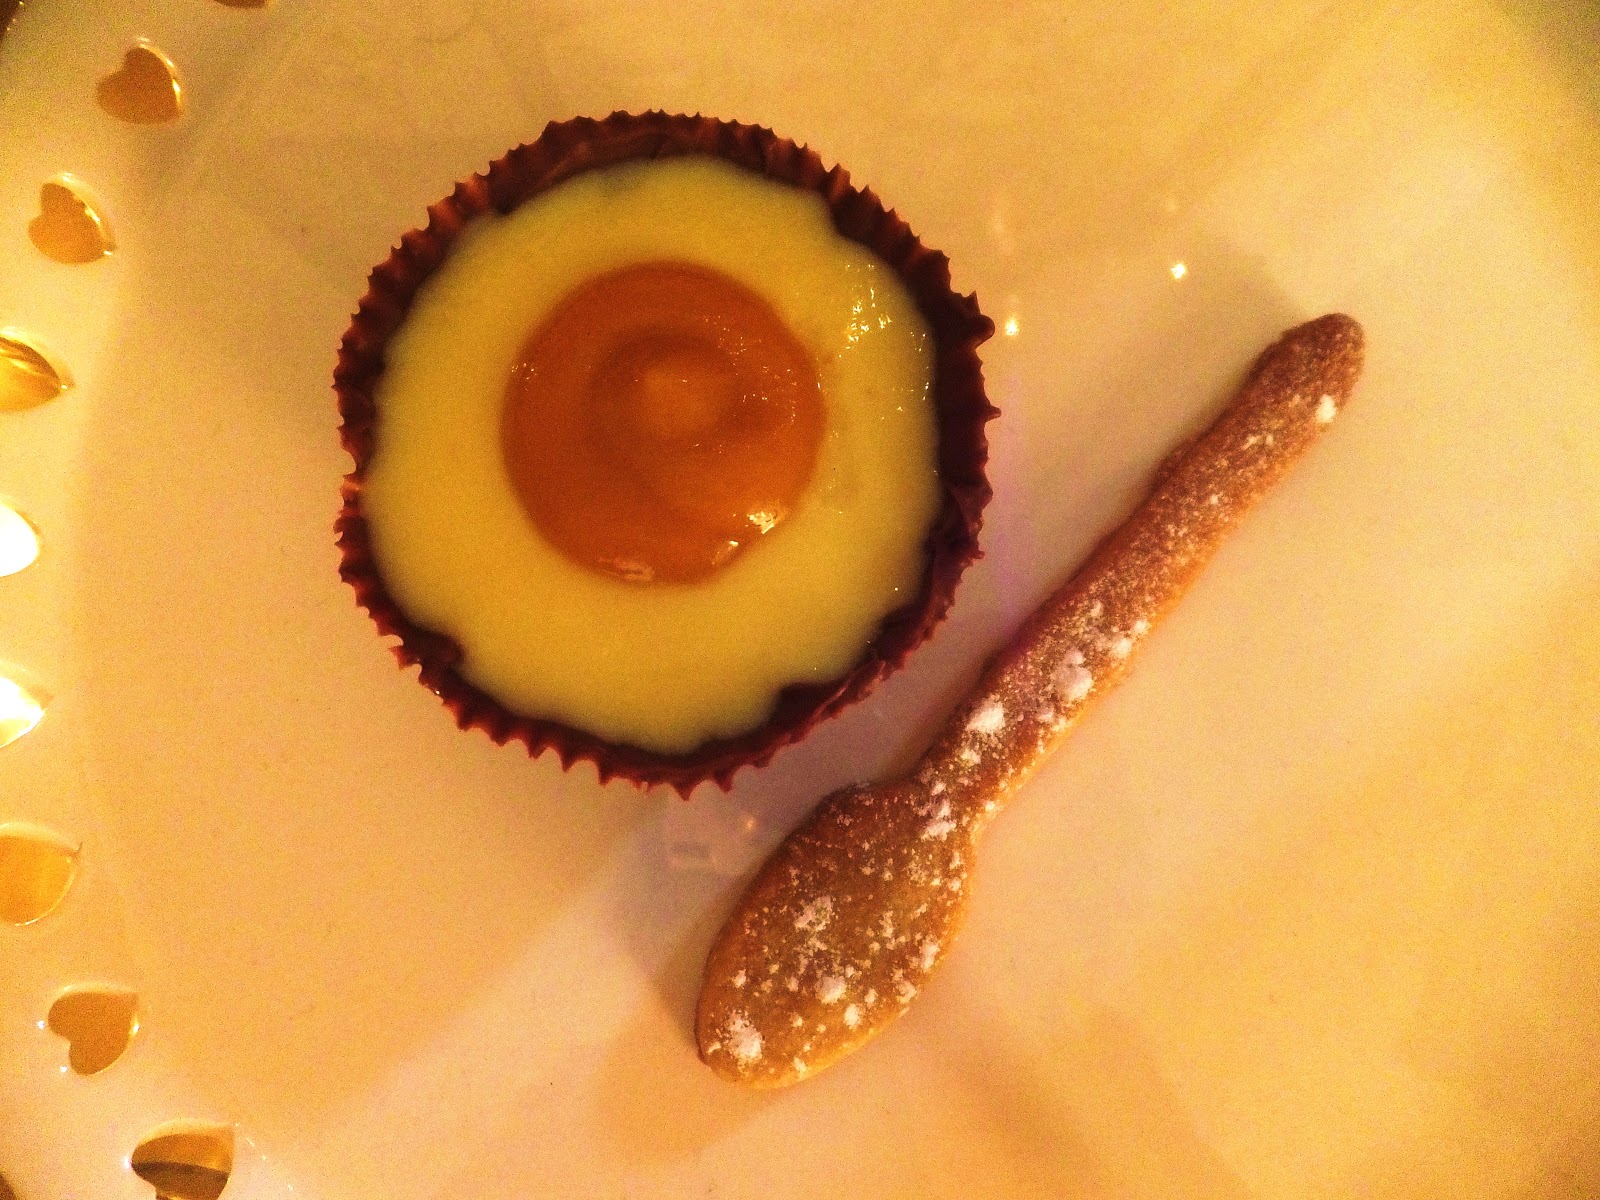
As Easter isn't too far away I decided to create a dessert that also looked like an egg! Why not?! The 'egg white' is the vanilla panna cotta and the 'yolk' is a mango puree.


There is an amazing brand of fruit puree's called Pulp, they're delicious and so moreish! Their funky packaging is very appealing, the three flavours are all yummy and best of all they're one of your five a day! I used the Banana, Mango and Passionfruit Puree, which is simply divine. You can buy Pulp from Waitrose and Ocado too.
Just add a small circle of the Pulp mango puree on top of the panna cotta.


Serve the filled chocolate bowl with the shortbread spoon on the side and there you have it, a completely edible dessert!


Are you going to have a go at making this?

Feel free to leave me a comment below :)


SHARE:

Tuesday, 5 February 2013

Valentine's Day Cupcakes with cakecraftworld.co.uk

Cake Craft World are 'the UK's leading cake decorating supplier with over 8000 products. From cake decorations, bakeware and equipment to cake boards and boxes, it's all available right here.' They really do stock everything you could every need for baking. The range is outstanding, with very specialist products, as well as items an amateur home baker would want!


I was kindly given the opportunity to try out the 'Be Mine' Valentine Cupcake Set from Cake Craft World (£5.99). The set includes 2 x 6 cavity red cupcake boxes, 10m x 5mm of white curling ribbon with small red hearts design, pack of 75 white cupcake cases with vertical hearts design and 50g red hearts sprinkles mix. The set contains everything you'll need to present cupcakes in a beautiful, romantic and personalised way.

I decided to make some Chocolate Cupcakes with a Hidden Surprise and Vanilla Buttercream Icing, using the cupcake cases and red heart sprinkles.

This is the recipe I used:
(Makes 6 cupcakes)

55g Soft Tub Margarine
55g Caster Sugar
1 Large Egg
85g Self-Raising Flour
1 tbsp Cocoa Powder
55g Chocolate, white/milk/dark it's your preference, broken into 6 pieces (I used Cadbury Bitsa Wispa)

Buttercream

125g Butter
250g Icing Sugar
1 tsp Vanilla Extract
Pink Food Colouring
Lilac Food Colouring

Method
1) Preheat the oven to 190'C. Put 6 of the Valentine cupcake cases in a muffin tray or double layer the cases if you don't have a muffin tray.

2) Put the margarine, sugar, egg, flour and cocoa powder in a large bowl, and, using an electric whisk beat together until just smooth. If you don't think there is enough liquid (it needs to be the consistency or thick double cream) then add a splash of milk. The moisture level of the mixture depends on the size of the egg you've used.

3) Spoon half the mixture into the paper cases and place a piece of chocolate in the middle of the mixture in each case. Then spoon over the rest of the mixture into the cases, so that the chocolate is covered.


4) Bake for 20 minutes or until well risen and springy to the touch. If you don't want to serve them with buttercream icing, let them cool for a couple of minutes and then you can eat the cupcakes while the chocolate in the middle is melted, yum!


5) If you want to cover with buttercream icing, as I have, then using an electric whisk combine the butter, vanilla and icing sugar together in a large bowl. Once it's fully combined, light and fluffy then split it between two bowls. You can colour the buttercream any colour you would like, or leave it plain. If you want to colour it only add a drop at a time of the food colouring and mix thoroughly between each drop, until you have your desired colour.

6) I used a piping bag and star nozzle to pipe on the buttercream to the cupcakes, once they had cooled completely. If you do it any earlier the buttercream with melt. Then sprinkle over the red hearts in the Valentine set.


Check out Cake Craft World full range of baking goodies on their website - cakecraftworld.co.uk :)

What do you think of my Valentine's Cupcakes?

Are you going to make anything for Valentine's Day?

Please leave me a comment below, I love hearing what you think!


SHARE:
© Treasure Every Moment. All rights reserved.
BLOGGER TEMPLATE BY pipdig